


Monthly Archives: January 2013
Petrified Wood
The following pictures are pieces of petrified wood in my collection. Those that I have personally collection are so noted with a story. Others, I purchased from the collection of others. The colors correspond to the trace minerals incorporated into the petrified wood: carbon-black, cobalt-green/blue, copper-green/blue, iron oxide-red, brown and yellow, manganese- pink/orange, manganese oxides- black/yellow.
This is a piece of Acacia wood from Auburn California. The identification was made by Walt Wright, a well known petrified wood expert from southern California. It is from a collection by Theo Steinhauser, long time member and president of SFGMS. 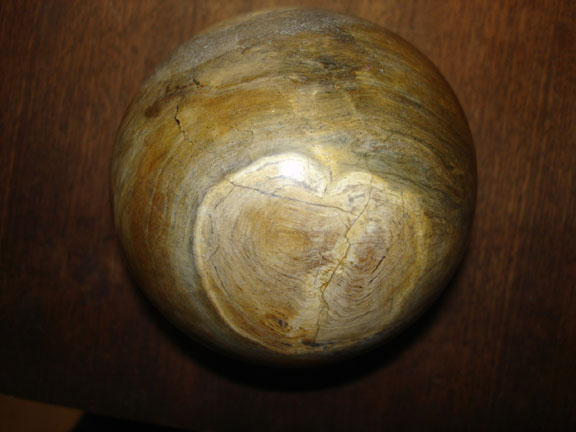 Here is a four inch sphere I made from a stump of Antioch Oak Wood from near Antioch California. It came off a ranch near Antioch that was since developed into a residential subdivision. I bought the stump off the rancher a few days before the bulldozers showed up.
 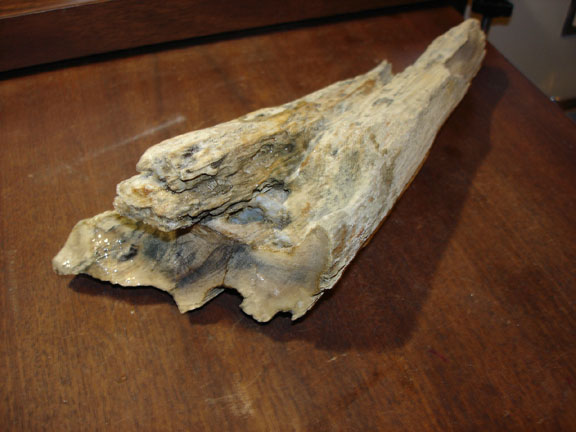 This is a piece of petrified wood from near Cedarville in the northeastern corner of California. I collected this interesting piece on a field trip with the Fossils for Fun club from Sacramento. There is plug of what appears to be near pure chalcedony in the center of the piece.
  Pictured above are a number of pieces of petrified palm wood that are labeled as being from the Mohave Desert in California. I believe some of the slabs may be from Sperry Wash, Death Valley.
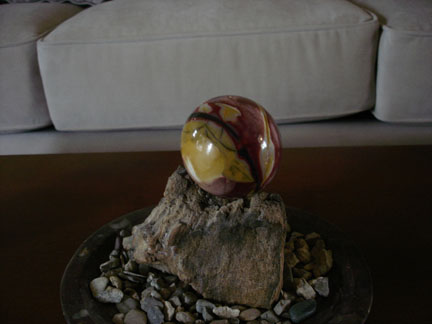
  This small sphere of Australian jasper is resting on a Suiseki piece of petrified wood from the Black Rock Desert in Nevada. The Suiseki piece I collected on a field trip I led into the Black Rock.
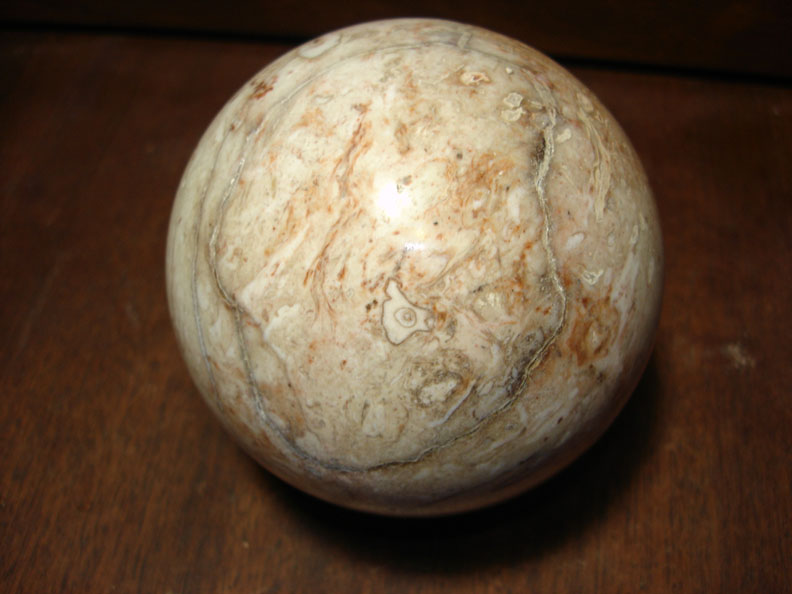 Palm Root Sphere-below
 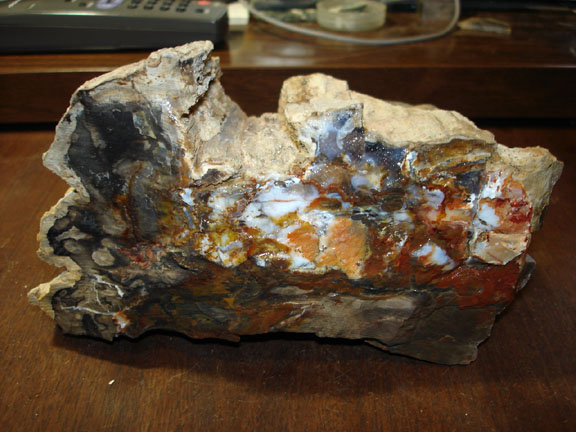 This is petrified wood from the Black Rock Desert in Nevada. This was collected by me along with Scott Paradis near the Lassen-Clapper murder site. Lassen, who is well known for the Lassen Cutoff to the California gold fields, was on a prospecting trip into the Black Rock looking for gold with Clapper and another man. They were bushwhacked at the murder site and Lassen and Clapper were killed and buried there. The other man escaped to tell his tale. I have often wondered if they did find gold and were killed by the survivor so he could keep all the gold to himself. Kinda, like Dobbs in “The Treasure of the Sierra Madre.” Scott is one of those souls you can count on that is up for a rock-hounding adventure anytime. On this trip I drove to the top of a steep hill in my Jeep in four wheel drive and Scott followed in his Ford pickup. I had loosened the rocks on my way up and he spun sideways and got stuck with rear end of his pickup up against a barb wire fence. Luckily with a couple of towing straps I was able to pull him from his predicament. We also crossed a wash with about two feet of water in the bottom without getting stuck.
 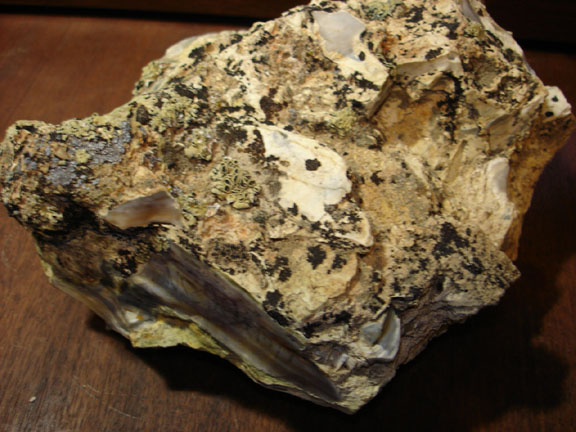 This is bog wood from near McDermitt Nevada. I found this on a trip with my two brothers, Lee and Scott. We also found Gary Green Jasper and a lot of plain pieces of petrified wood. On this trip Scott and I went from Winnemucca to Gerlach via Sulfur, camping at a hot springs near Gerlach then headed north from Gerlach through Soldier Meadows and Summit Lake ending up at Virgin Valley Camp for more soaking in a hot springs before spending the next night at White Horse Hot Springs in Oregon. Scott got out his harmonica and played a few blues numbers to entertain me and some uninvited coyotes that joined in. After a couple beers and soaking in the hot springs and enjoying the nighttime sky, even the coyotes didn’t sound too bad.
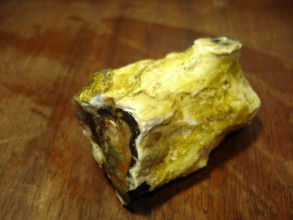
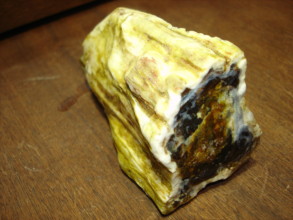
  Colorful opalized wood from near McDermitt Nevada.
  This is a piece of colorful wood I collected from Hubbard Basin Nevada. The Boise rock club was there digging when I arrived at Hubbard Basin. One of their members graciously let me dig in his hole after he was finished for the day, where I found this piece and the next piece. The BLM later filled in all the holes and when I went back in later years I did not find any more nice pieces even though I dug down a couple feet. I know there are more nice pieces of petrified wood there and maybe some day I will dig down about four feet to them in that glory hole.
 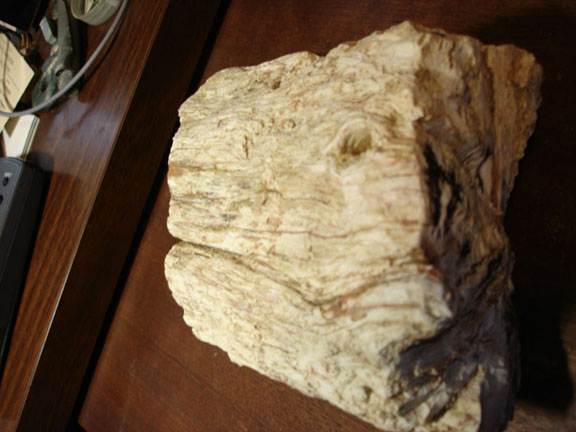 More Hubbard Basin Wood I collected. Note the great knothole in this piece.
 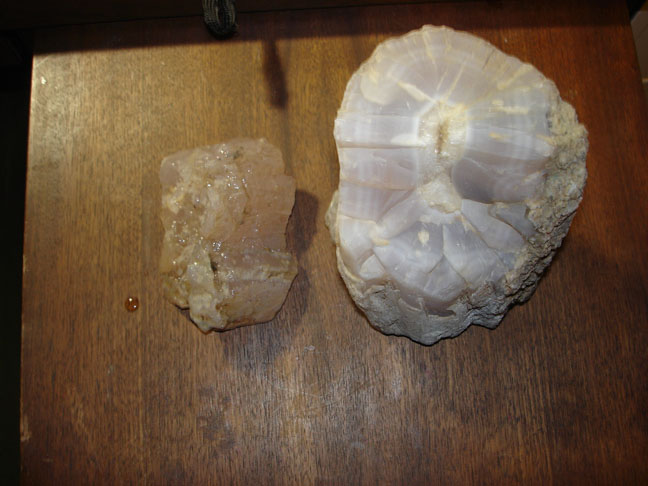 Pink limb casts from Texas Springs Nevada. I camped there in the middle of fire season and was worried that if there was a fire I might be trapped. I later found out I could have gotten out by heading in the opposite direction I came in from.
 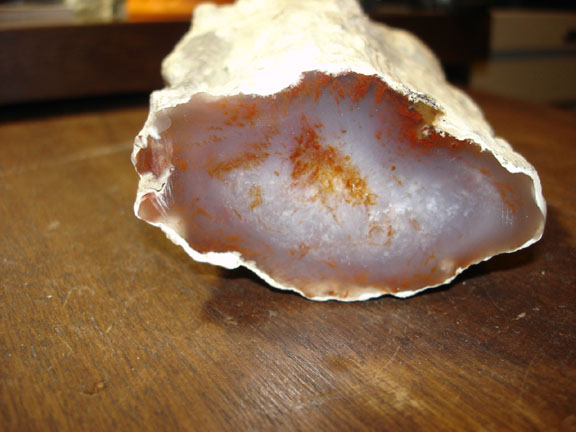 From the Little Humbolt River near the Ash Chimney Creek Reservoir, Nevada
 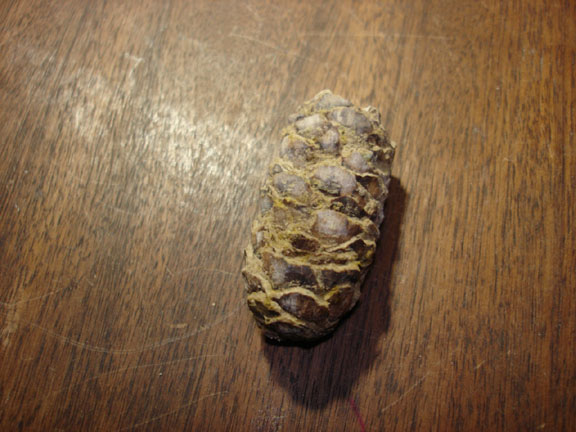 This is a petrified spruce cone from the Virgin Valley Rainbow Ridge Precious Opal Mine that my brother Lee found when we shared a front end loader load of material from the pit. Lee found this one and another that is likely to contain precious opal. We have never cut any of them open to see if they do contain precious opal. This one is in my collection.
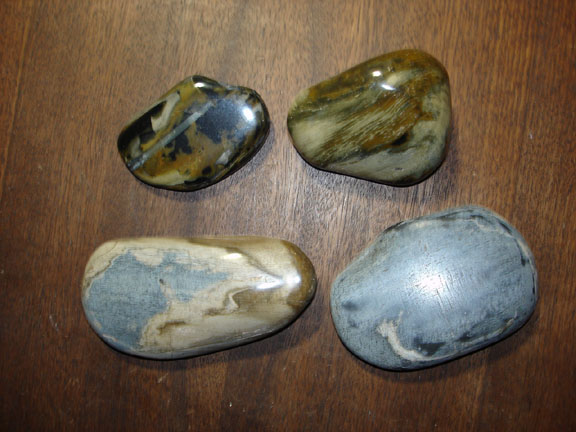
Here is some myrtle wood from the Seven Devils Beach, Bandon Oregon. In California we call myrtle wood, California bay laurel. It is the same tree. It is surprising how little trees have changed over the millennium. So little, that we can use books for identifying existing trees to identify species of petrified wood. I was given these by Joyce Dunn. 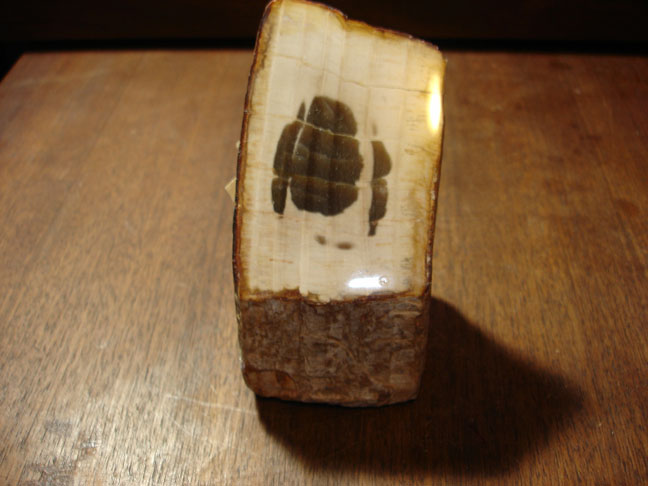 This is another specimen from the Steinhauser collection. Theo labeled it “Pedocarpus Genus:Pedocarpus, Family: Pedocarpaceae, Loc: Linn County Oregon, Geological Age: Oligocene, Geologic Formation: Little Butte”. That is another way of saying it is from a pine tree that is 25 million to 40 million years old located at Little Butte in Linn County Oregon.
 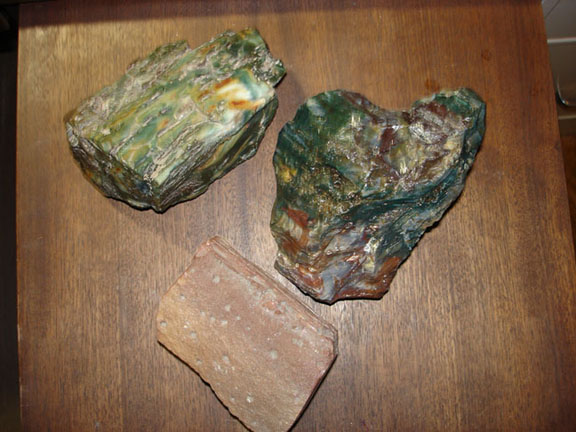 This is petrified wood from Hampton Butte, Oregon. It takes an excellent polish and is highly prized for lapidary work, particularly the green colored material. The bottom piece exhibits worm holes. I collected this either on a trip with my brother Lee, or my club, SFGMS.
 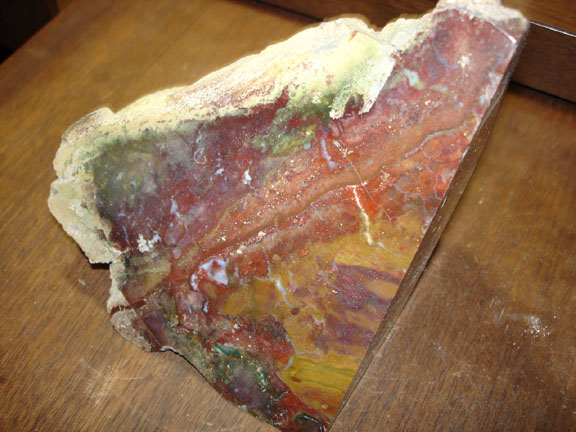 This is a piece of Marston replacement wood. My brother Lee and I went to the Marston Ranch to get some of this material. Mr Marston, the ranch owner, was in the pit with his crawler tractor digging out material for the Rockhound Pow Wow, of which we belonged. For some reason, I would guess there was a better dig on another ranch, we were the only ones there. We spent some time discussing haying, cows, and other things ranch related with Mr Marston. He gave me a large piece of the wood he had just dug out, of which this is a piece. The Pow Wow trips to the ranches around Madras Oregon twenty years ago were really productive for great material.
 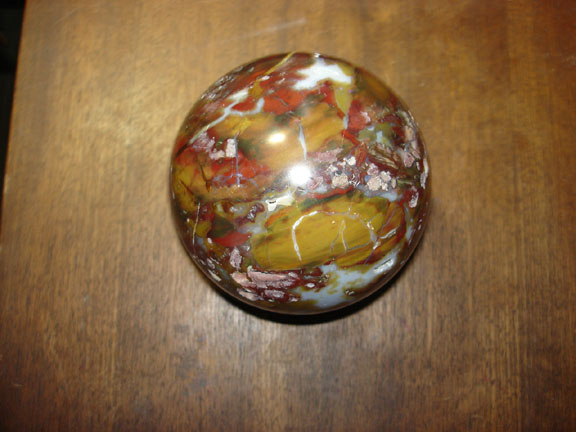 This is a four inch sphere I made from another piece of Marston replacement wood I collected on a later trip with the SFGMS club of which I am a member.
 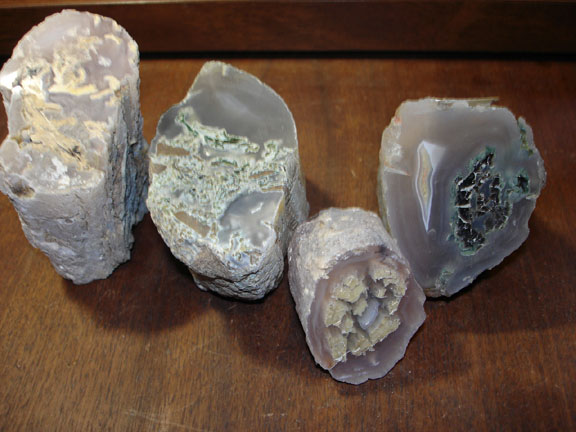 These are limb casts I collected from near Paulina Oregon. I have been there four or five times to collect this outstanding petrified wood. The middle piece standing up is the first piece I collected there with my brother Lee. Contrary to the tall tale Lee tells that I stepped on his hand to keep him from grabbing it first after it was unearthed, I unearthed it on my side of the hole and he did not have a chance to grab it.
 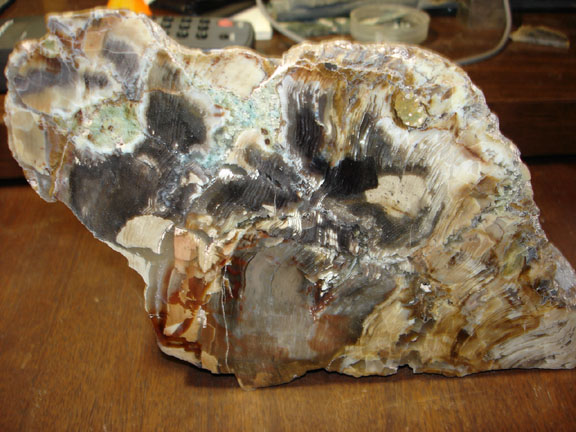 This is a slab of a chunk of a log Lee did dig up at Paulina. I got a slab of it for cutting and polishing it for him. It does contain some of the green agate that Paulina Limb Casts are noted for.
 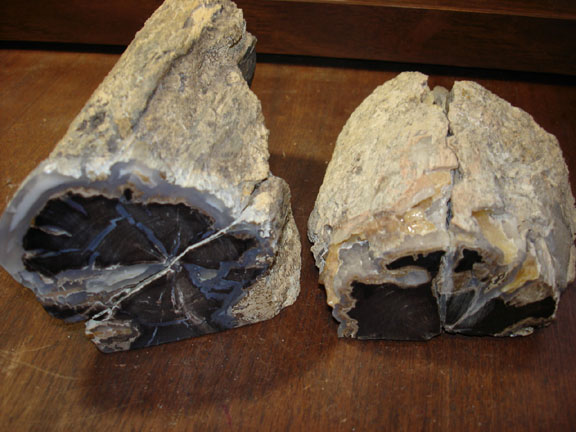 This is some of the Blue Forest wood I collected from near Farson. We always stop at Farson for some great ice cream as do most Wyomingites traveling through.
 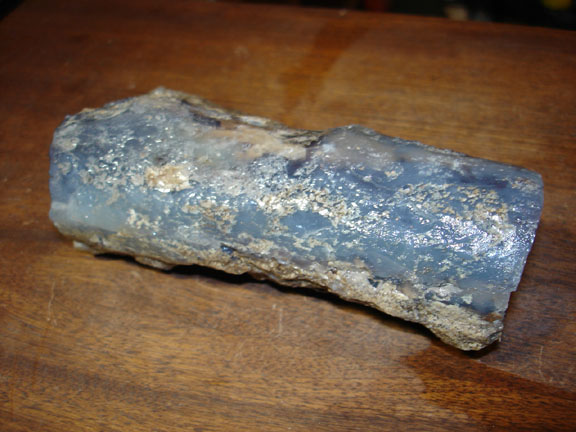 This is another Blue Forest limb self-collected. I ground off the petrified algae to show the blue chalcedony.
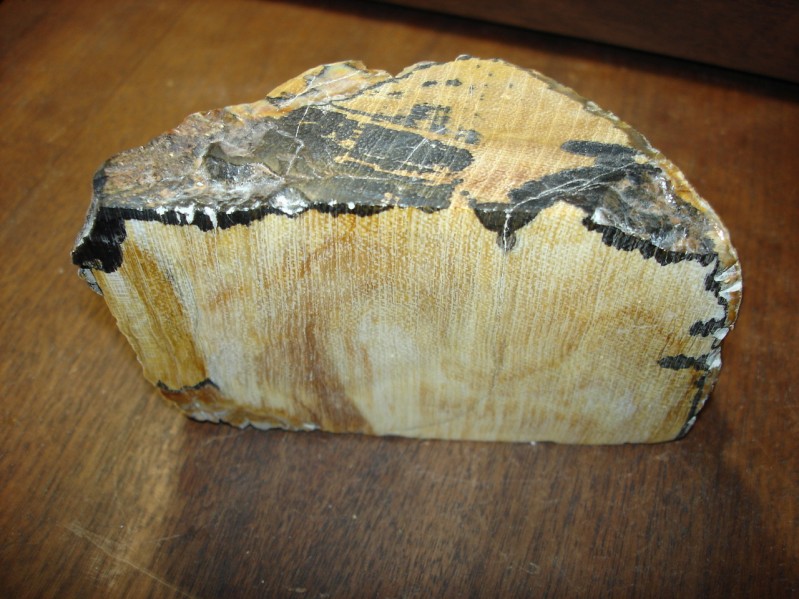
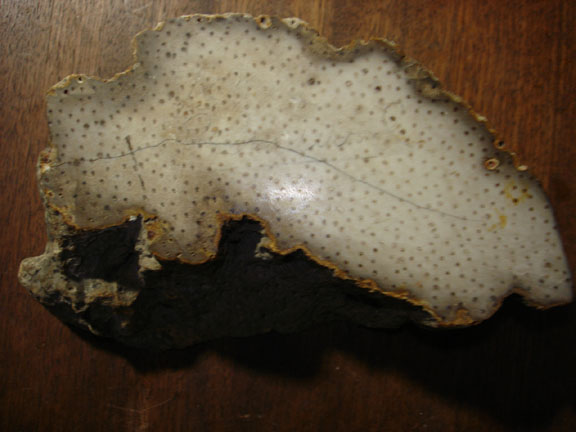
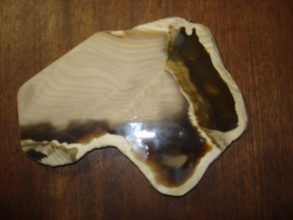
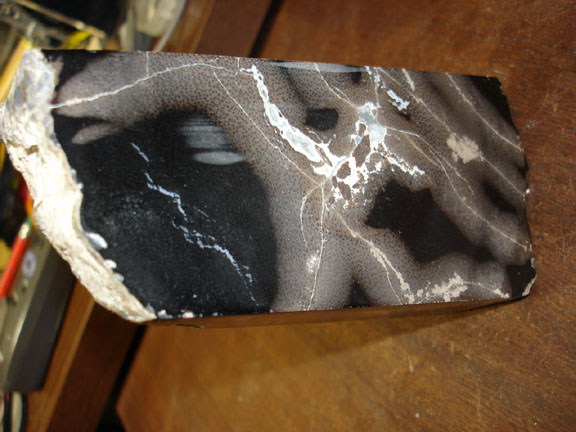 This is rather strange piece of petrified palm wood from Eden Valley Big Sandy Wash, Wyoming. It is black on one side with obvious pits characteristic of palm wood, but it is a light grey on the other side that has been cut at a difference angle of 18 degrees from this side.
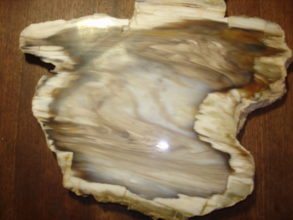
 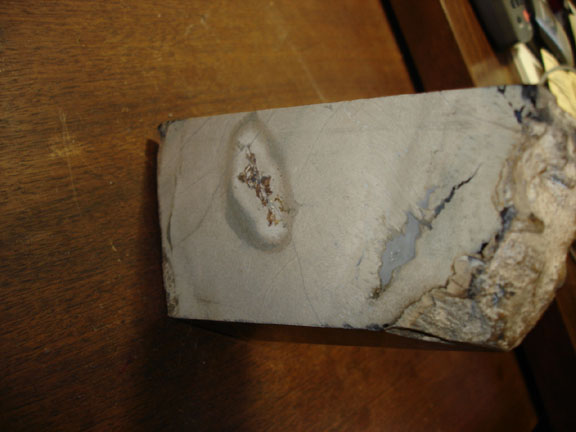 This is the other side of the same piece of palm wood. All the other sides of this piece are black except for this side. I believe this effect is the result of soaking in bleach in sunlight for a month or more. I acquired this piece from Rose’s Rock Shop in Casper when they went out of business.
 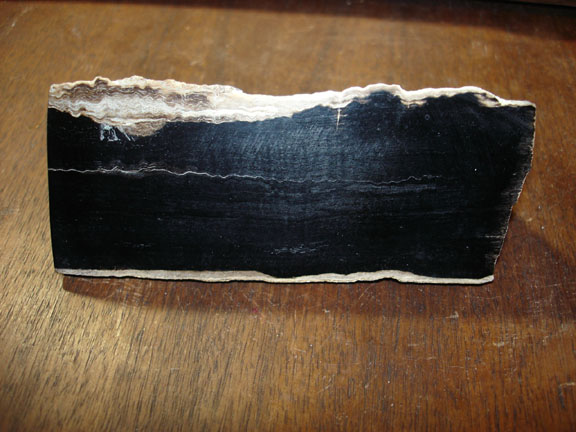 Here is another piece of wood (pepper wood?), from the Big Sandy Wash near Eden Valley. It was also acquired from Rose’s in Casper and also exhibits a strangeness. It has a shimmer when light strikes it at this angle. I tried to polish it further and it lost it’s shimmer with further polishing. I have since de-polished it somewhat to keep the shimmer. You can see some of the shimmer in the upper center of the above picture.
 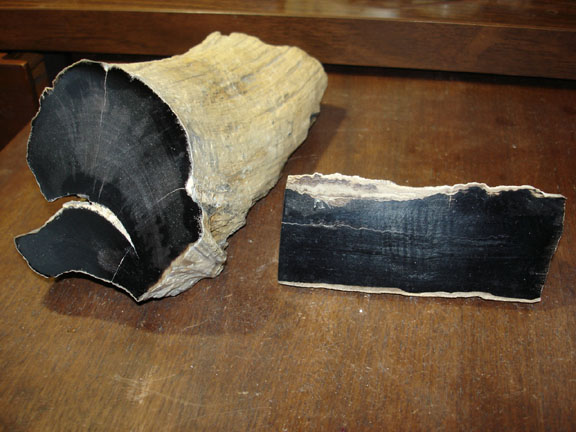 Here is a picture of the same piece of shimmering wood and a piece of Eden Valley pepper wood from the Eocene Period, about 58 million years old.
 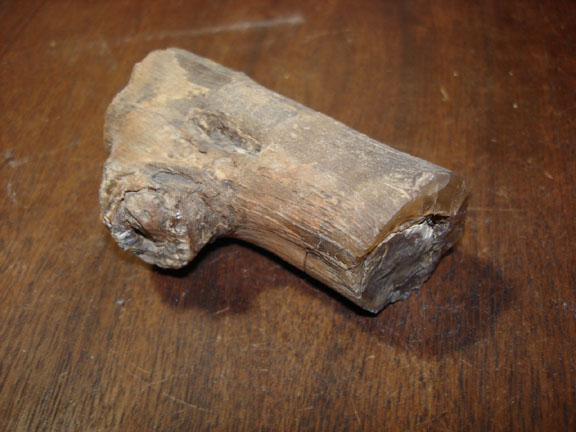 Oregon Buttes piece I collected. It is highly agatized with a nice knot and branch node. I found it under the power lines.
 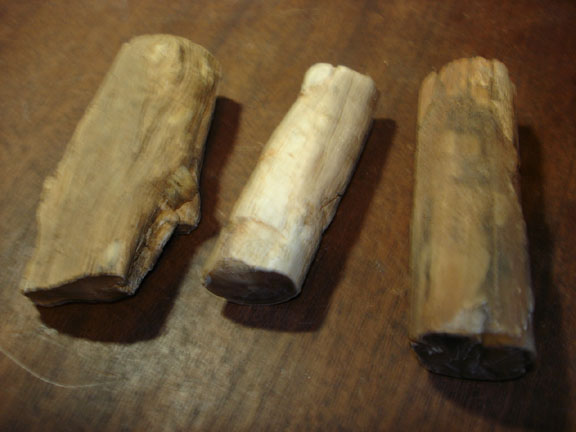 These are more highly agatized pieces I found under the power lines near Oregon Buttes.
 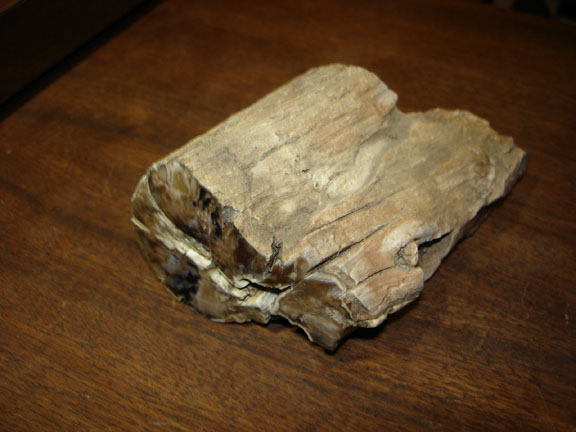 Another one of my Oregon Butte Limbs.
 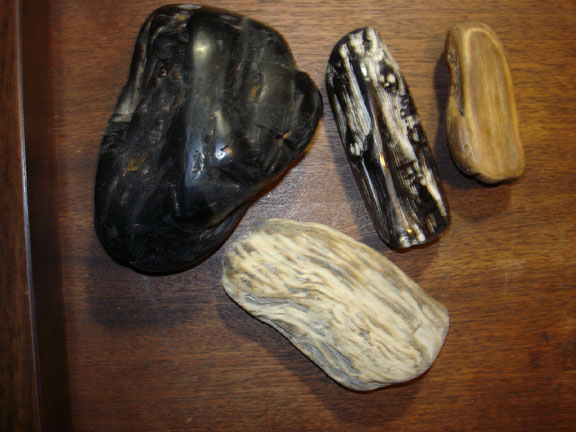 This is Montana petrified wood from the Yellowstone River gravel beds found while looking for Montana agates. It is highly agatized. I really like the black one with a white knot hole and grooves. I thought about making it a handle for a knife blade of Polar jade, but decided it is best left alone.
 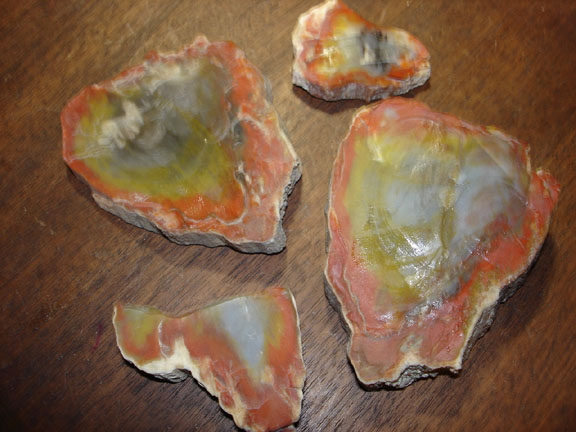 I collected this colorful petrified wood from near the Henry Mountains in Utah a few years ago. Also found a lot of Coprolite on that trip.
  This is a sphere I made of bog wood from the same trip near the Henry Mountains in Utah.
 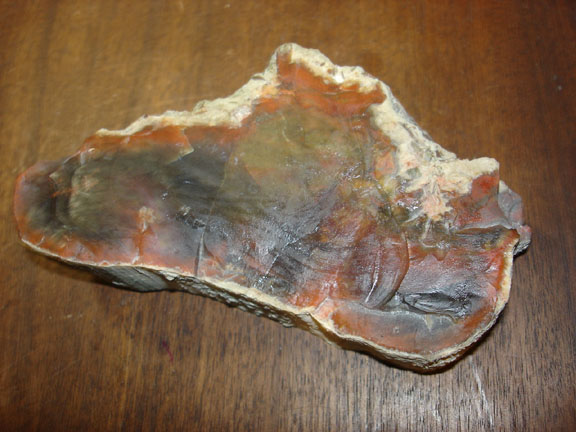 This is some Yellow Cat Wood from Utah from the same trip as the Henry Mountains.
 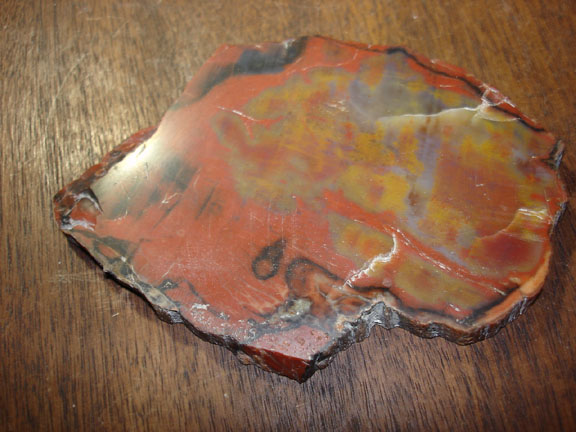 More Yellow Cat Wood from Utah I collected.
 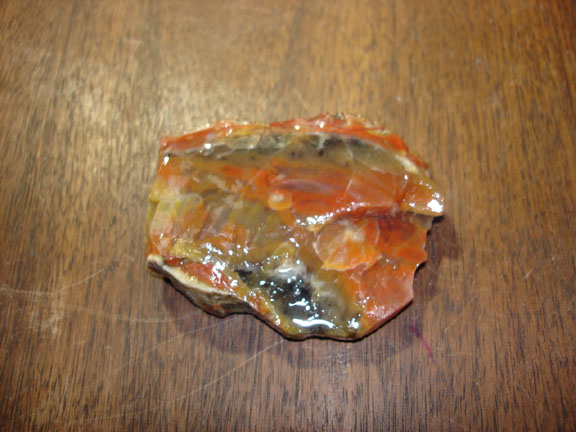 A small piece of Yellow Cat Wood self-collected.
 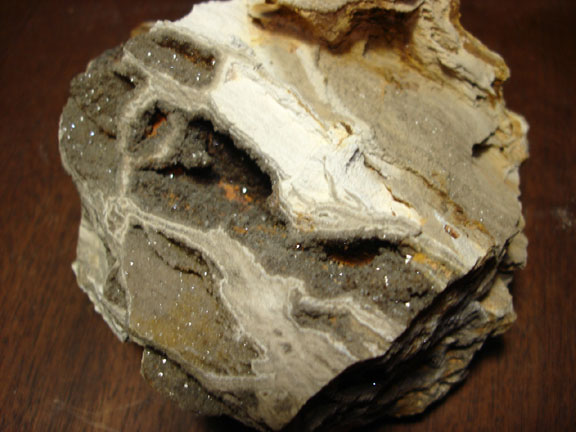 This is a piece of drussy encrusted petrified wood from northwest Alabama I acquired in a trade. It was found in Barbour County 4 miles south of Clio, Alabama. Coming from the Wilcox Group, Nanafalia Formation, Paleocene Epoch. Around 60 million years ago. The type of wood has not been determined for sure. One expert told me it is Paraphyllantoxylon alabamense. I will take his word for it. The Druzy Quartz makes this wood extra special.
 This is a piece of palm wood, probably from Texas.
 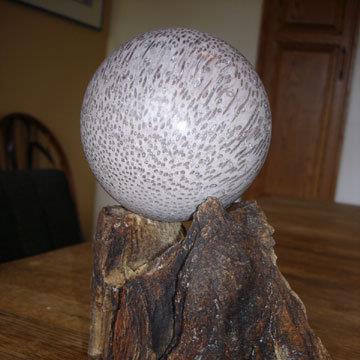 Palm wood sphere I made resting on my Suiseki stump piece from the Black Rock Desert with desert varnish.
 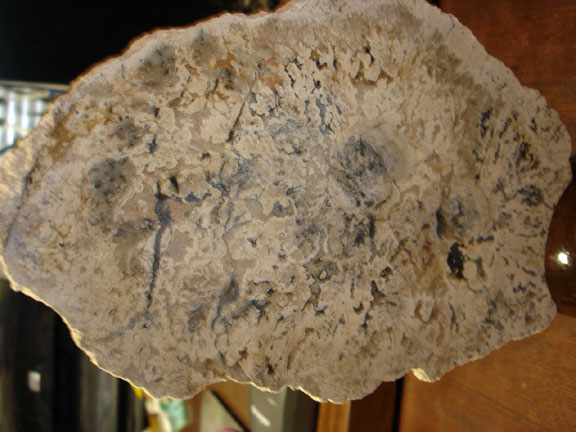 Tempska Tree Fern Slab
 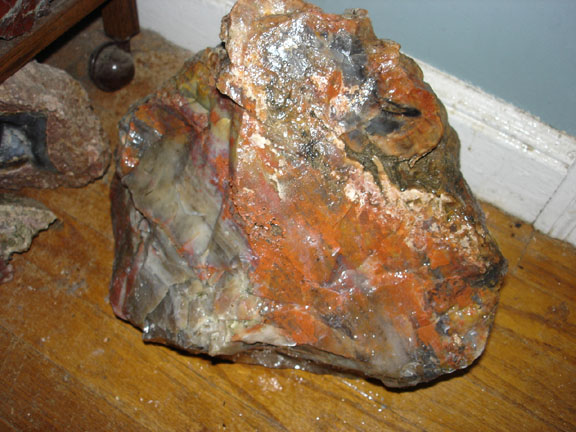 Forty pound chuck of Arizona wood from near the Petrified Forest.
 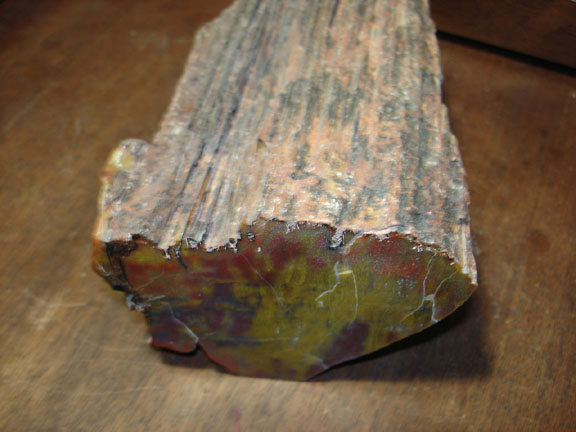 Arizona Wood, Petrified Forest, Araucarioxylon, Triassic Period, 200 million years old.
 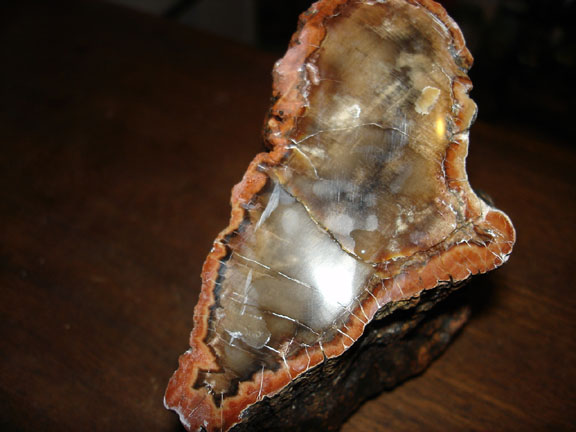 Not sure what this is, maybe monkey puzzle wood.
  This is Monkey Puzzle wood from the Circle Cliffs Utah
Here is a couple pieces of Shadow Mountain wood from Oregon collected with and from Aaron Wanner’s claim.
Roger Mtn Oregon Sequoia 15.5 million years old.
Saddle Mtn Wood Washington. Metasequoia 15 million years old.
Article on Sphere Making for Newsletters
The Fine Art of Field Collecting and Making Spheres
By Jay E. Bates
Making of spheres is not difficult but it takes large rocks and much time, usually from 24 hours to 50 hours of sawing on large rock saws and grinding and polishing on sphere machines. Softer material such as alabaster, onyx, and marble will cut faster and are desirable for first time sphere cutters. The ideal finished size for most spheres to maximize value and desirability is about four inches. Because of the size of material needed to make a sphere, it can get costly to buy all your material. Luckily you can go on SFGMS club field trips and collect large rocks that make ideal spheres.
Part One: Finding that One-of-a-Kind Rock to Make a Sphere
Some of my favorite places to search for large rocks suitable for spheres on field trips are the Monte Cristo Mountains in Nevada, Davis and Lassen Creek in California for sheen obsidian, many onyx and marble quarries and locations, and the Clear Creek area for jadeite. There are also many jasper and jasper/agate locations in many states that can also make very desirable spheres. I usually look for rocks on field trips that are about 6 inches in the minimum width and wet them down to get a good view of the colors and patterns. The farther you walk away from parking areas the more likely you are to find large enough rocks for spheres as most people are not willing to carry large rocks any distance. You should try to select a rock with a minimum of cracks and holes. However, a vug with crystals can be desirable feature for some spheres. I have also made some nice spheres from Morgan Hill Poppy jasper with cracks since the material seems to stay together while grinding even when shot through with cracks. Using such material does require the use of Opticon or similar stabilizer with rock dust of the same material before sanding. It takes a good eye to visualize a final sphere from your rock and selecting for pleasing colors and patterns makes the whole process worthwhile in the end. Some material such as sheen obsidian or star rose quartz are always desirable for spheres as you do not have to worry about orientation for optical effects since with a sphere you always get the desired optical effect on a couple sides of the sphere.
Another good place to look for large rocks for spheres is at weekend rock sales. Many times excellent material can be found at such sales at reasonable prices. Don’t be afraid to negotiate a lower price as usually the sellers do not want to end up with large rocks on their hands after the sale. Similarly, once in awhile you can score a nice rock for a sphere at the end of a rock and gem show since the dealers are reluctant to lug large rocks back to their vehicles.
Part Two: Sawing Your One-of-Kind Rock into a Cube and Later a Octadecagon
Once you get your unique specimen home you will need to wash it off and measure its least dimension to determine how big of a sphere you can roughly make. Most of you will be using the large saws in the shop. BEFORE YOU USE THE LARGE SAWS IN THE SHOP YOU WILL NEED TO BE CHECKED OUT BY AN INSTRUCTOR IN THE USE OF THE LARGE SAWS. If you bend a blade in the large saw it costs a lot of money to replace. If you do bend a blade you may have to pay for it. I am around on most Friday evenings, when I am not out field collecting, to help with sphere making. On Fridays, I or another instructor will help you once or twice with setting up the large saws until we are confident you are using the right procedures.
When placing a rock in the two larger saws place a block of wood in the vise opposite to the rock to provide a counterforce to the rock in the vise. Remember the vise acts like a teeter-totter on the connection in the middle. Use wooden wedges to get maximum grip on the rock. Finally give a yank on the rock with your hand to see if you can pull it loose before starting the saw. If at any time during the sawing you see smoke or hear a significant change in noise coming from the saw stop the saw and see what is going on. Get help if necessary.
To begin sawing first find the flattest and largest side to your specimen, make your first cut parallel to that side and as close to that side to minimize lose of material. Once that cut is made, lay the flat cut side down on the saw carriage and make the next cut on the flattest and biggest side at 90 degrees from the first flat cut side.
You will now have two flat sides at 90 degrees from each other. Keep one of the flat sides down on the carriage and the other flat side up against the from of the carriage and make another cut minimizing the loss of material but getting another side 3/4 to nearly the same size as the first two cuts.
After the third cut, get out your tape measure and measure the least dimension between either flat side and opposite sides near where the center axis of your sphere is going to be. This is going to be the maximum size your can make your sphere. Choose a size slightly less that your determined maximum size and make a fourth cut that distance from one of the flat sides with again one flat side on the bottom of the carriage and another flat side up against the front of the carriage. Keep doing the same for the last two cuts until you have a cube.
Once you have a cube you will now have to mark your cube with lines as to where the cuts are going to be made to get an eighteen sided solid (octadecagon) that can be put into the sphere making machine after some rounding of the corners. The following values are used to scribe your cube for the cuts:
W is the width of the cube. X is the distance in from an edge of the cube to where a line is scribed parallel to the edge of the cube. B is the width of each of the eighteen sides of the final eighteen sided solid. Use an aluminum scribe to scribe the lines.
W=X+X+B =2X+B X=.707B* B=1.414X W=3.414X X=.2929W
*From trigonometry for a 45 degree angle to get the equal widths on all the sides of your eighteen sided solid and a maximum sized sphere from your cube.
Original Cube Width, Inches, In Fractions of Inches
________________ ______ ____________
1.0 .29 5/16
1.25 .36 3/8
1.5 .44 7/16
1.75 .51 1/2
2.0 .58 9/16
2.25 .65 5/8
2 .5 .73 3/4
2.75 .80 13/16
3.0 .87 7/8
3.25 .94 15/16
3.5 1.02 1
3.75 1.09 1 1/16
4.0 1.16 1 3/16
4.25 1.23 1 1/4
4.5 1.31 1 5/16
4.75 1.38 1 3/8
5.0 1.45 1 7/16
5.25 1.52 1 1/2
5.5 1.6 1 5/8
5.75 1.67 1 11/16
6.0 1.74 1 3/4
Once your lines are scribed you can use either a jig or a block of wood to cut at a 45 degree angle from each flat of the cube along the lines scribed on each flat. There is a metal jig for the middle large saw in the shop and a wooden jig that can be clamped to either of the two larger saws. You can also use a plain old block of wood cut at a 45 degree angle to tilt your cube at 45 degrees to the saw blade.
Lines are scribed on the cube using an aluminum marking scribe or permanent marker.
Once your lines are scribed you can use either a jig or a block of wood to cut at a 45 degree angle from each flat of the cube along the lines scribed on each flat. There is a metal jig for the middle large saw in the shop and a wooden jig that can be clamped to either of the two larger saws. You can also use a plain old block of wood cut at a 45 degree angle to tilt your cube at 45 degrees to the saw blade. With your cube now cut and tilted at 45 degrees in the saw you now need to cut off the corners to get an octadecagon. This will take twelve cuts.
After the octadecagon is completed you will need to take it to a rough grinding wheel to round off the corners even more; in our shop that means using the 80 grit diamond wheels. Do not push the octadecagon against the diamond wheel, let the wheel do the cutting without excess force as that wears out the diamond wheels prematurely. Also do not grind on the very edge of the wheel as that can remove a strip of diamonds from the wheel.
When the corners have been substantially ground off, it is time to place the rounded octadecagon in the sphere grinding machine. We have one sphere grinding machine dedicated to rough grinding and one for sanding. There is also a dedicated sphere machine in the polishing room for final polishing. All of our sphering machines were built by Richardson’s Ranch in Oregon, who is no longer building sphering machines. I have built several sphering machines from scratch as discussed in an article in the June 2005 Rock and Gem Magazine entitled “Bates’ Sphere Machines” Please feel free to contact me if your are interested in building your own sphere making machine.
With the rounded octadecagon, in the rough grinding machine in the corner of the shop, the spring tensions need to be adjusted to get the right force of the grinding cups against the octadecagon. Also the angles of the grinding cups needs to adjusted to get the proper motion of the octadecagon in the cups. A “random walk” motion of the octadecagon is needed to get even grinding on all sides of the octadecagon. If the octadecagon does not move randomly in the cups during grinding you will only get circular grooves ground into your octadecagon. If that happens, you will need to remove the octadecagon from the sphering machine and return to the grinding wheel to totally remove the circular grooves from your octadecagon. The angle of the grinding cups is adjusted using an end wrench to move one of the grinding cups toward the middle or away from the middle of the sphere machine and tightening down the locking nut on the cup hinge when you have the octadecadon doing the proper “random walk” in the sphering cups. As you grind, you will eventually arrive with a round sphere except for some round dots. You will need to keep grinding until all the round dots are ground away. Once the round dots are ground away you have a sphere.
After grinding, the sphere is placed in the sanding sphere machine and various grits of silicon oxide are applied to the sphere with a steady water drip to make a sanding slurry. You will use coarse grit, usually 220, then 400, ending with 600, to remove all the scratches from your sphere. Adjustments to the sphering machine are similar to those you used for the rough sphere grinding machine. The sphere is then thoroughly cleaned with soap and water before placing in the polishing sphering machine for final polish. Final polish is obtained using a slurry such as water with tin oxide or cerium oxide or other similar polishing compound. Run in the polishing sphering machine until the desired polish is obtained. Your sphere is now complete for you to proudly display. Congratulations!